
Setting Up e-Payments/Direct Deposit

We want to ensure you receive your funds quickly and safely. Paper checks often get lost in the mail and take extra effort on your end to deposit.

Here's how to set up e-payment from the San Francisco Education Fund

Directions:

  1. You will receive an email invitation from bill.com with the subject line, "Payment from San Francisco Education Fund delivered quickly -- direct to your bank account."
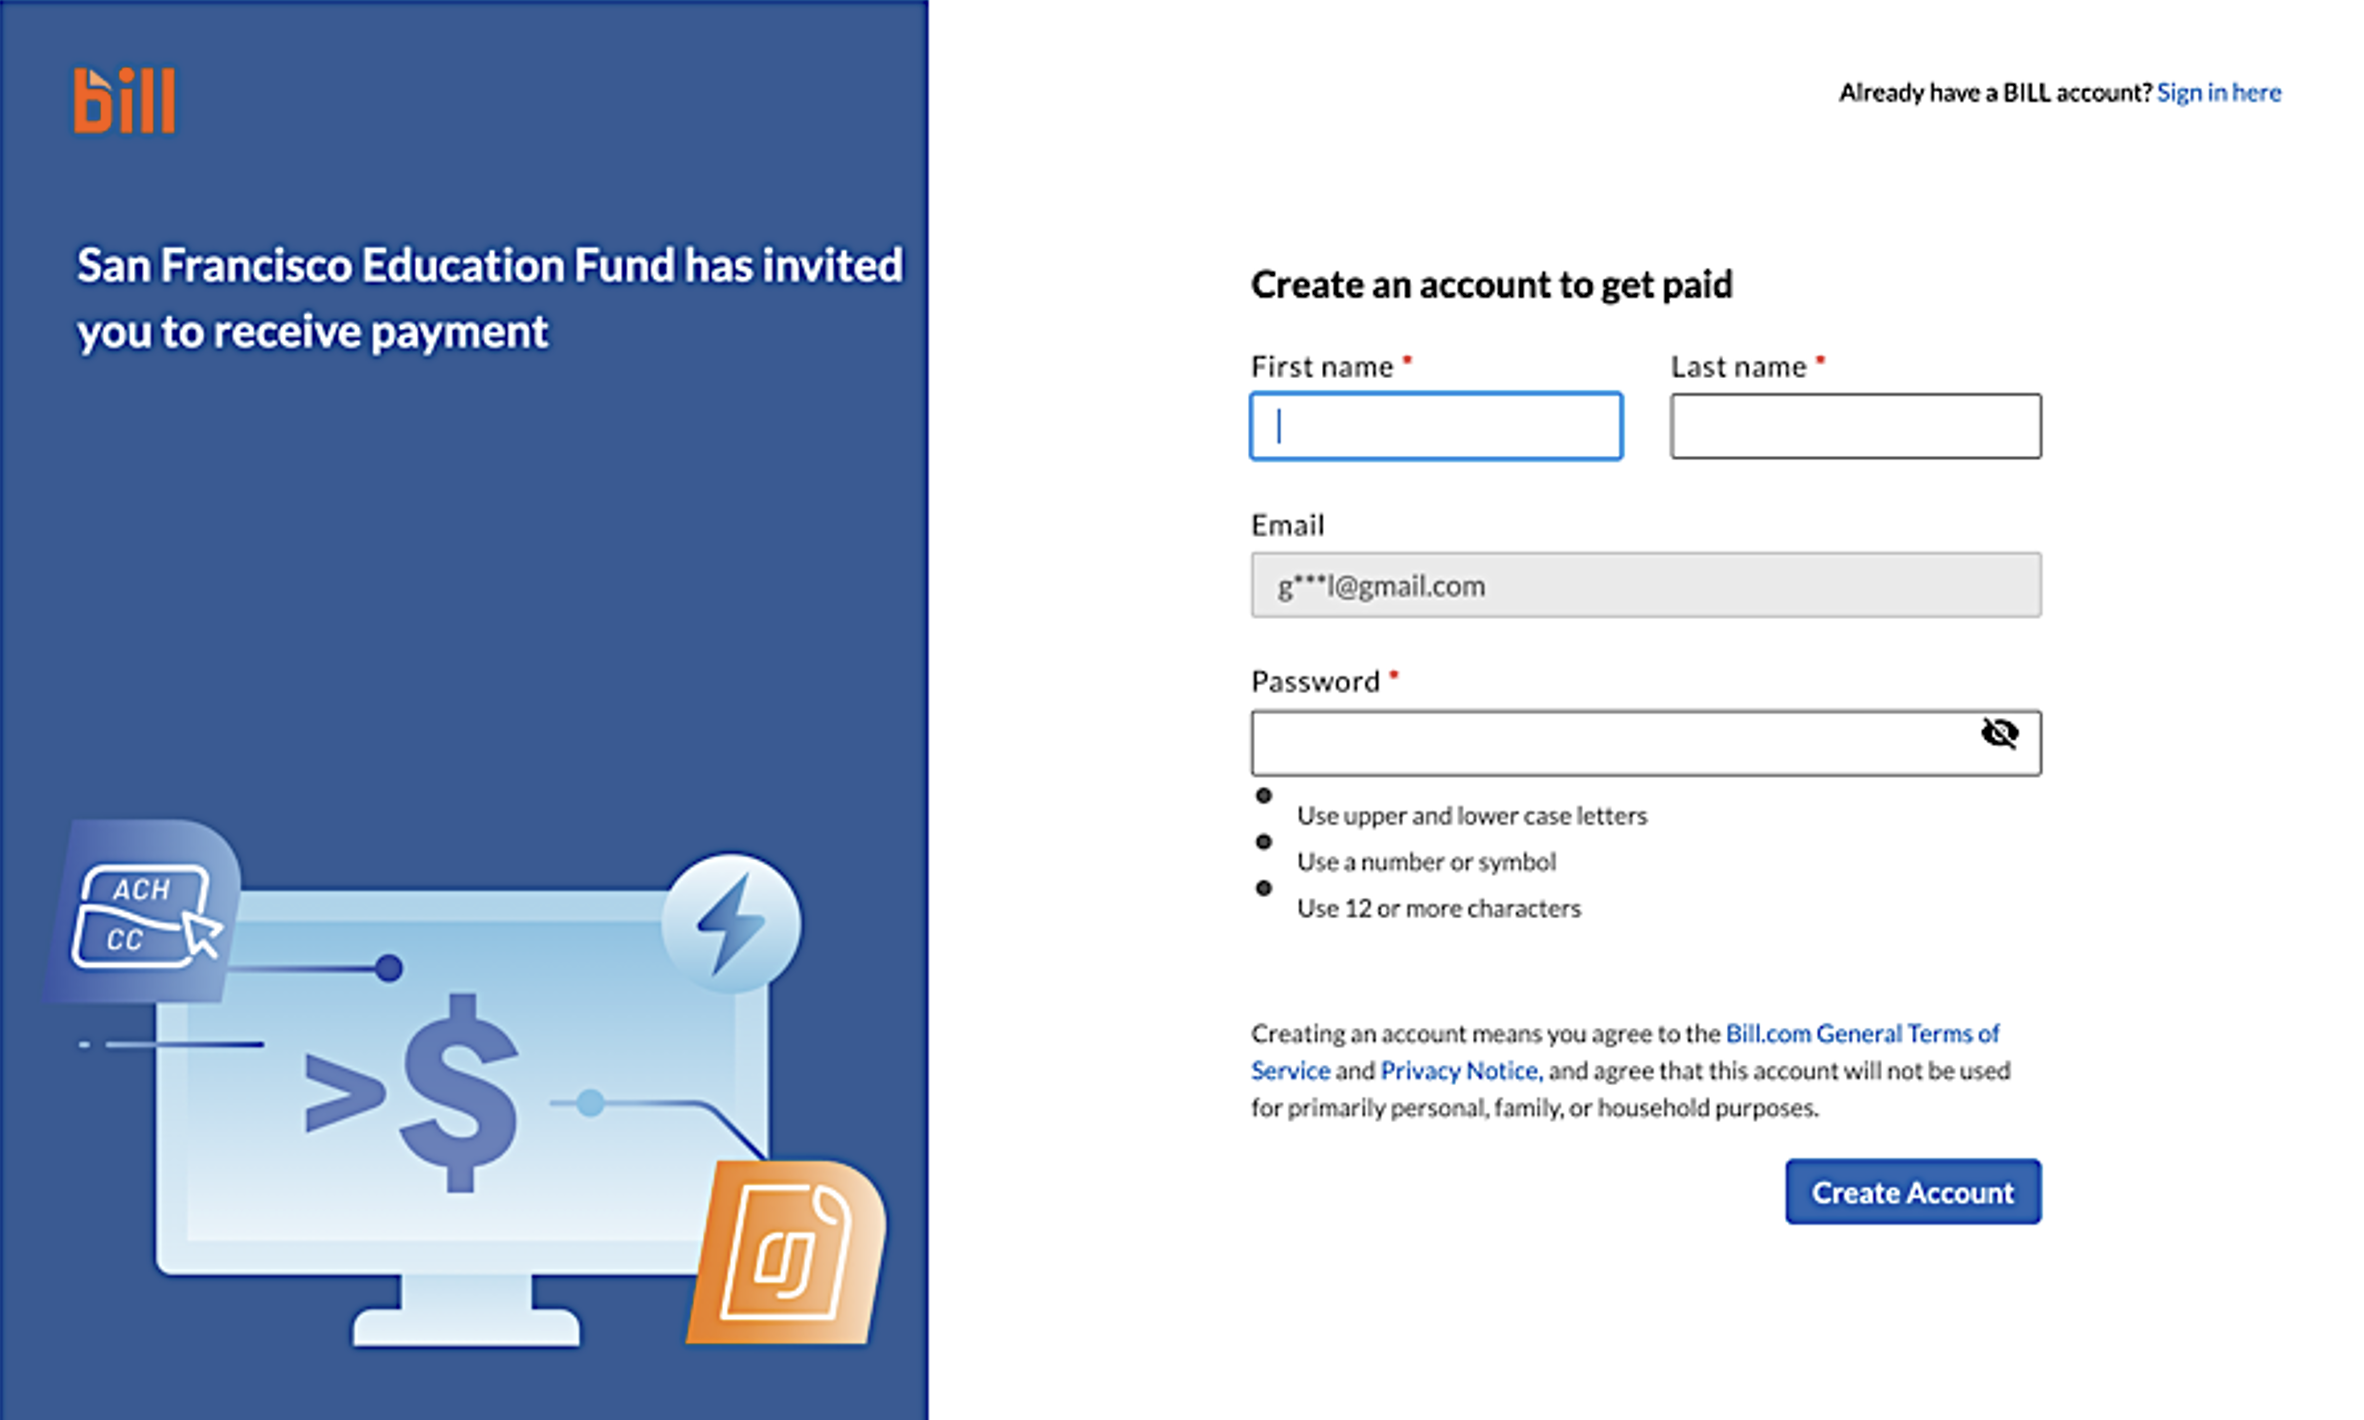
  2. Click the "Accept Invite" button in the email. 

  3. You will be asked to provide your Name, email address and to create a password, then click "Create account" button
    Bill.com Create an Account screen
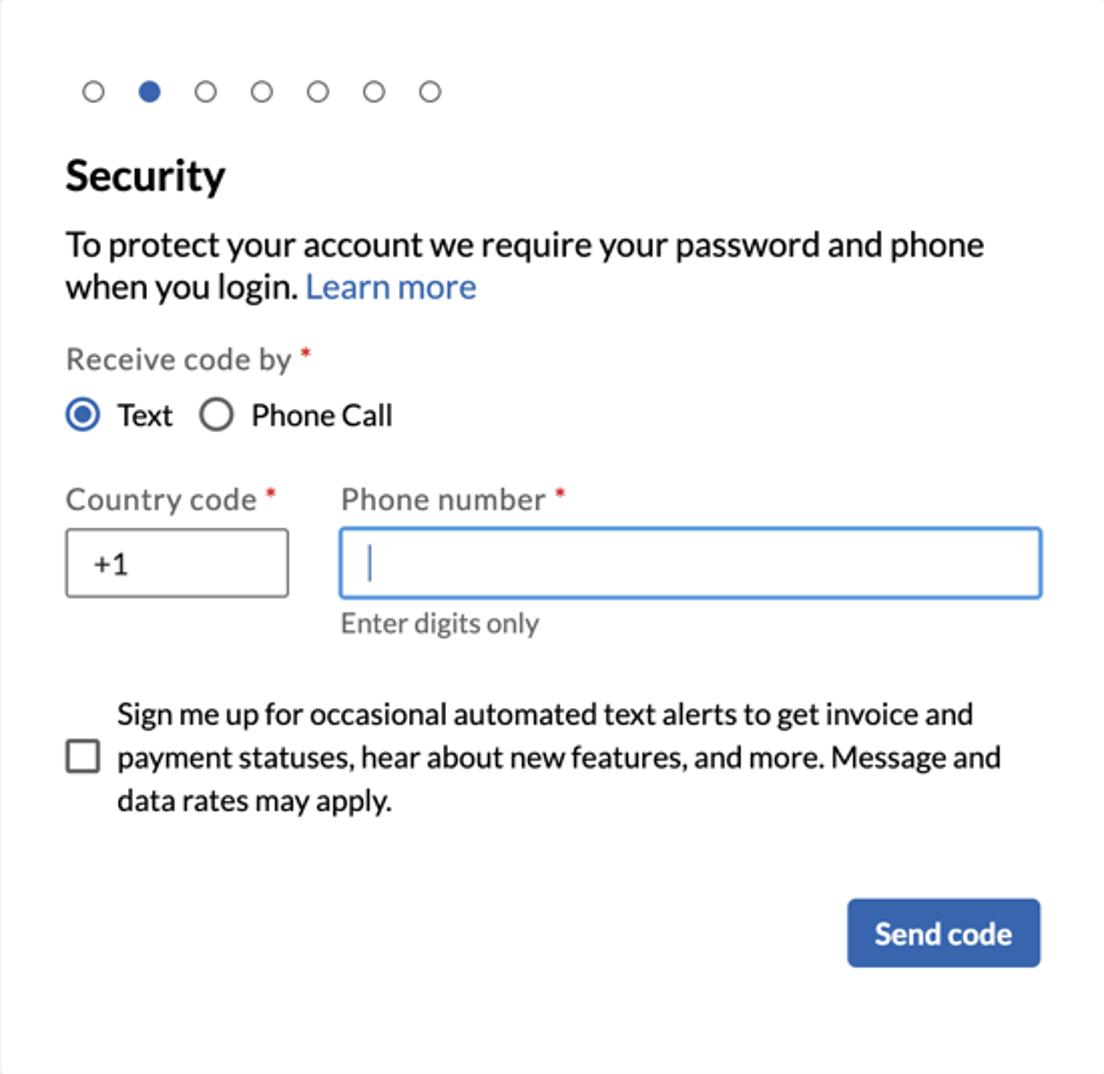
  4. You will be prompted to enter your mobile phone number to set up 2-factor authentication. 

    Bill.com 2-Factor Authentication setup screen.
  5. Enter the 6-digit code you received via text message into the BILL.com window.
  6. You will now be prompted: "Let's start by telling us if you want to use BILL for anything else." Make sure to select "I'd like to send invoices and get paid." (see below) 
    Bill.com setup screen 4.
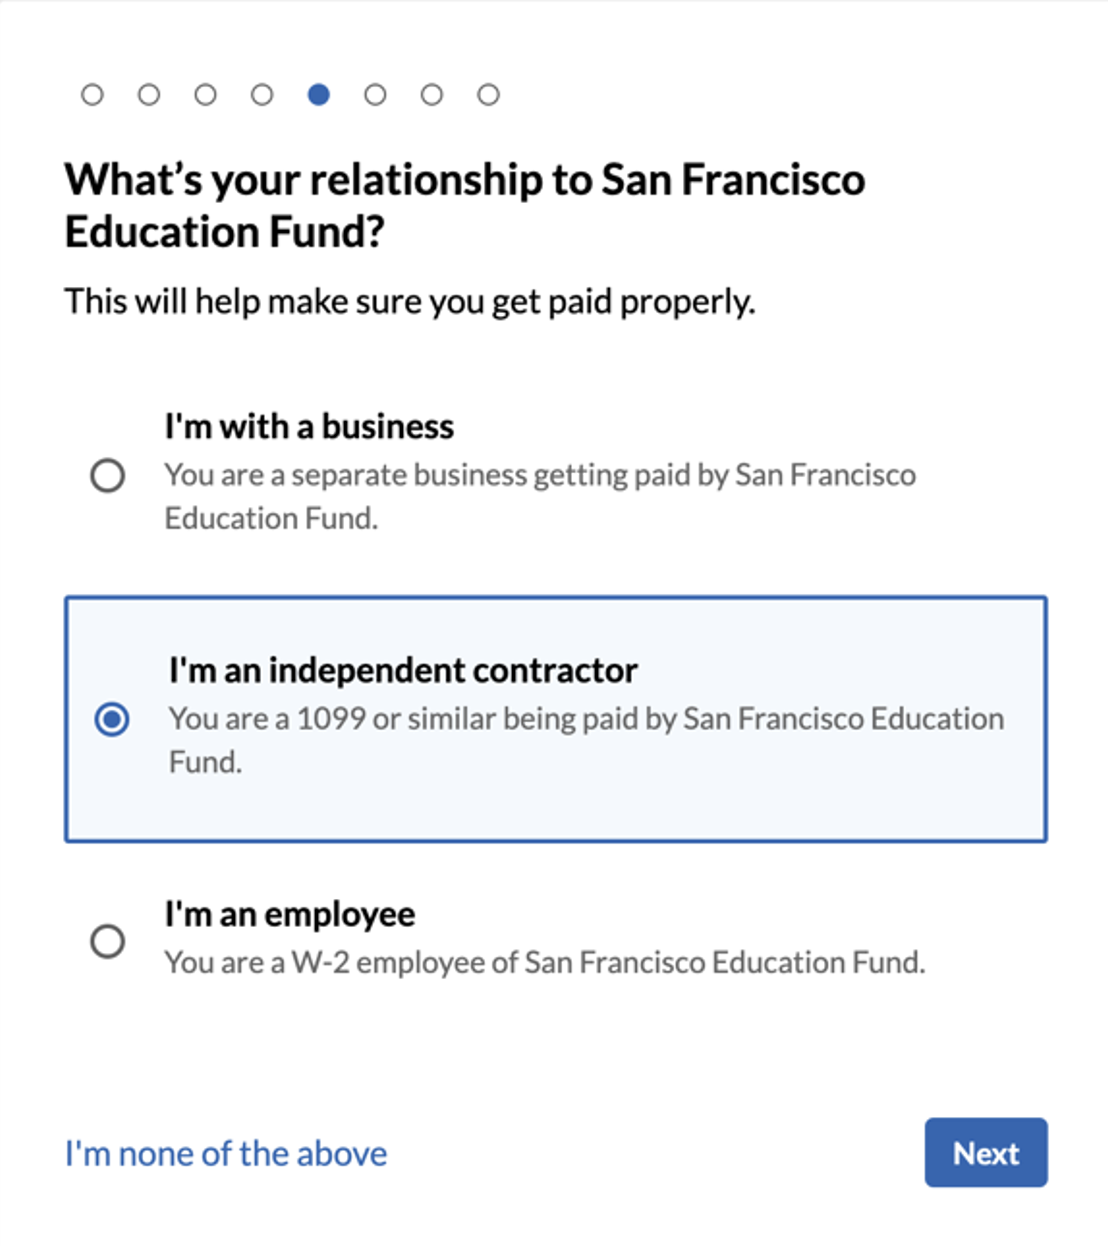
  7. You'll be asked, "What is your relationship to San Francisco Education Fund?" Please select "I'm an independent contractor

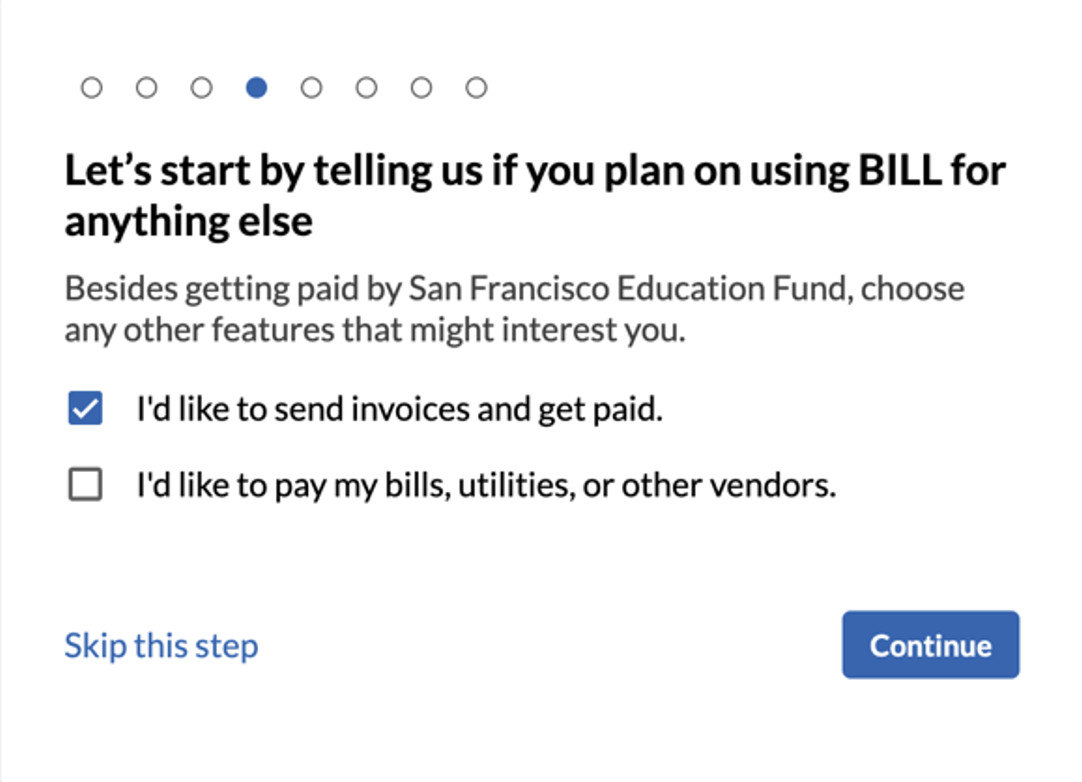
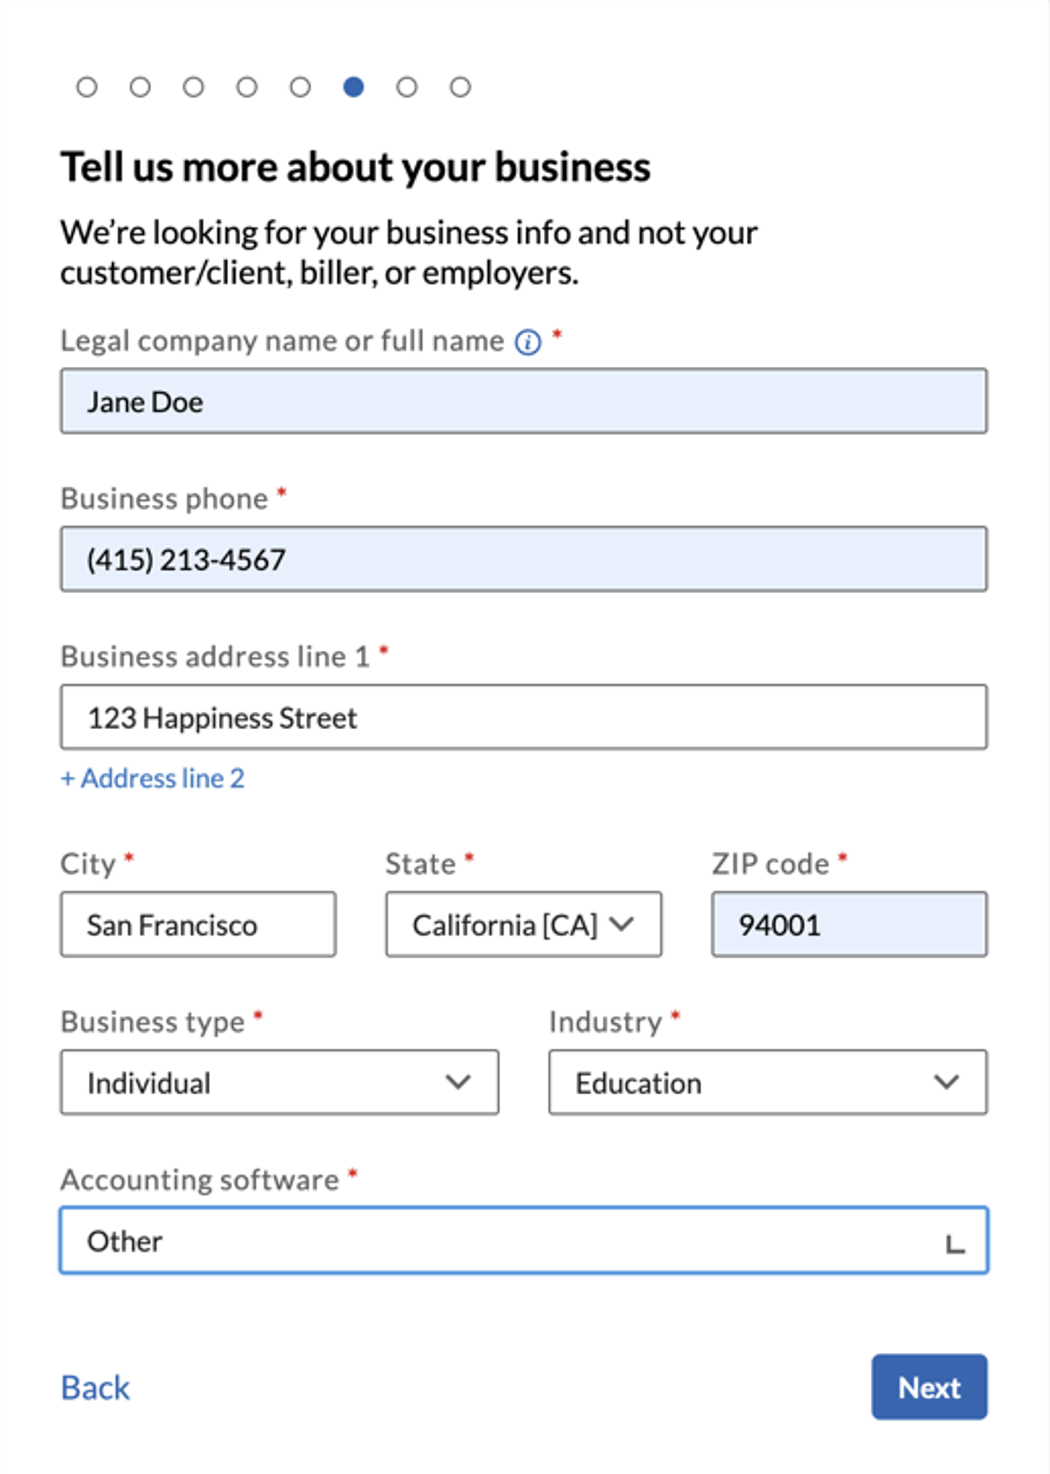
  8. Fill out the section labeled "Tell us more about your business

    Bill.com setup screen 6.
    • Entering your Full name, Phone Number, and Mailing Address
    • For Business type, select “Individual” from drop-down menu;
    • For Industry, select “Education” from drop-down menu;
    • For Accounting software, select “Other” from drop-down menu
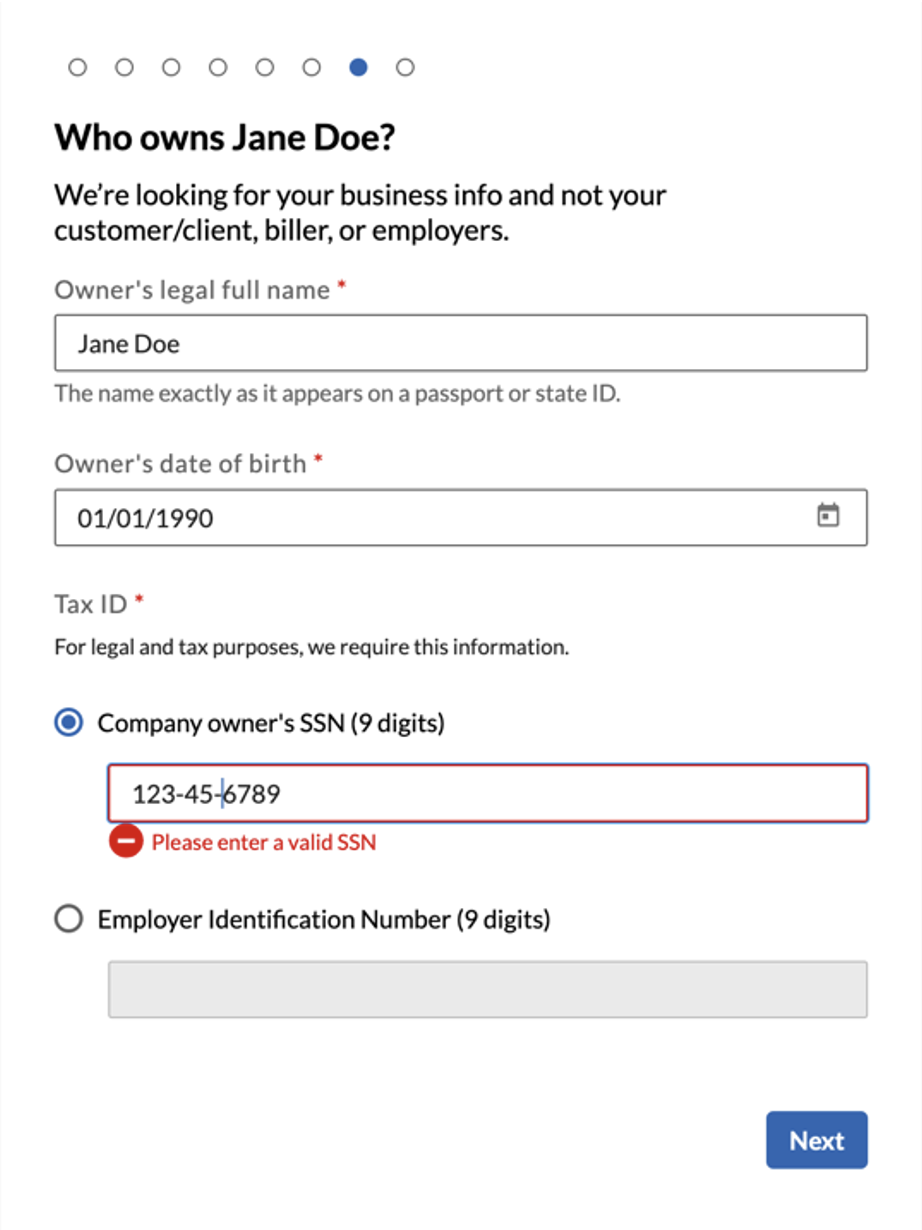
  9. On the next screen, titled “Who owns {Your Full Name}? Enter your Legal Full Name, your Date of Birth, and your Social Security number 

    Bill.com setup screen 7.
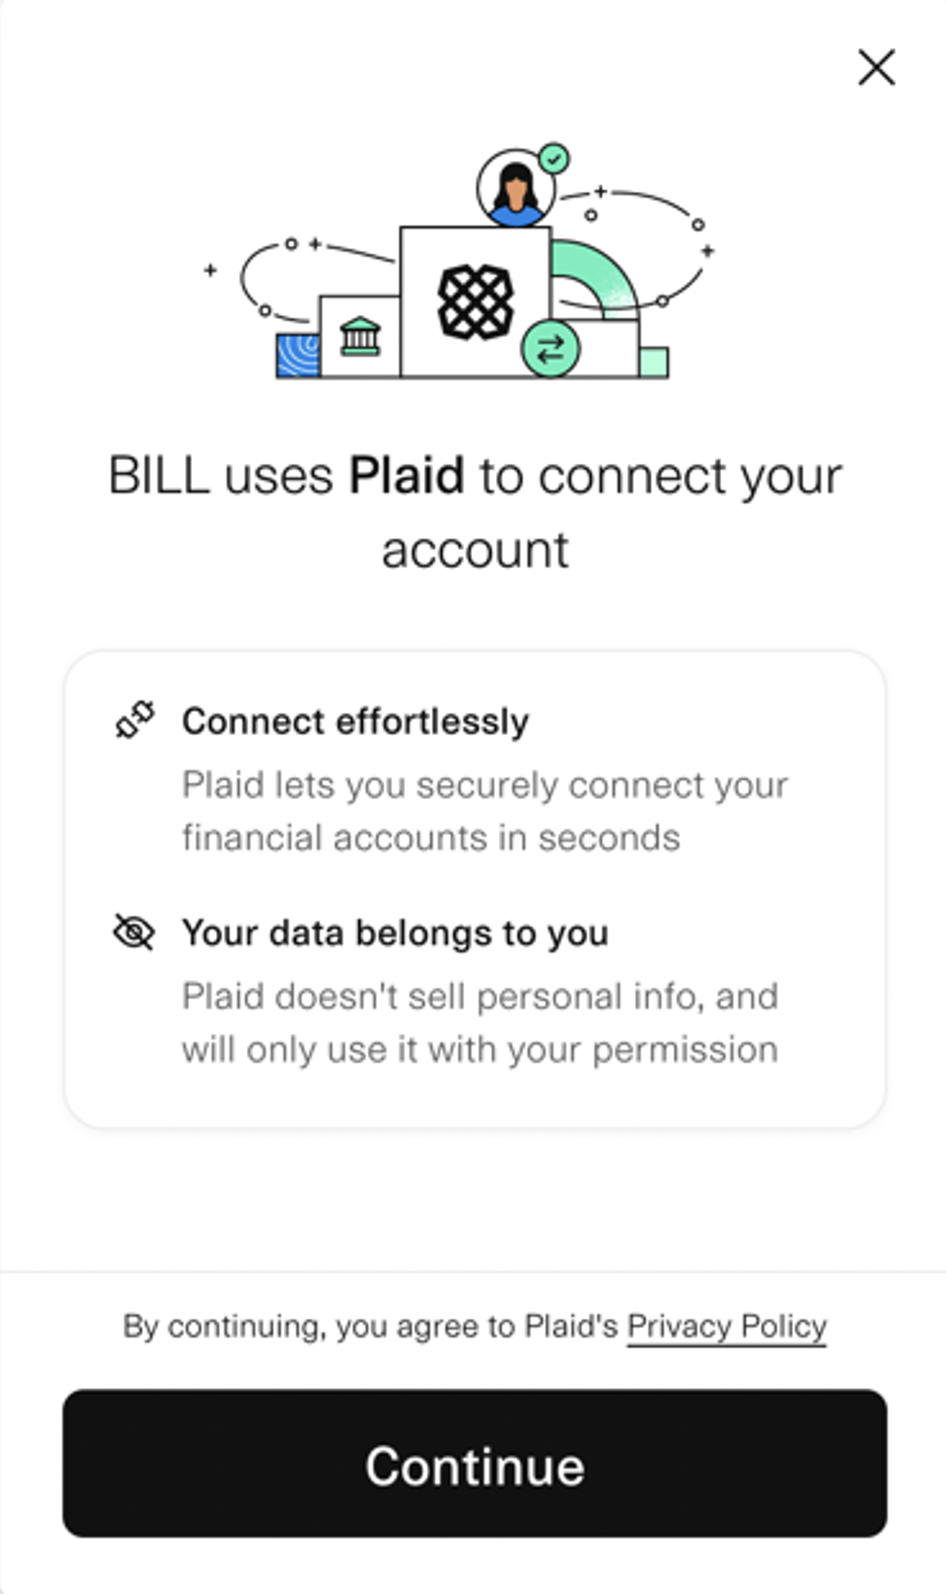
  10. Once you click “Next,” you will be taken to the Plaid screen (see below). Click the “Continue” button. 

    Bill.com Plaid connection screen.
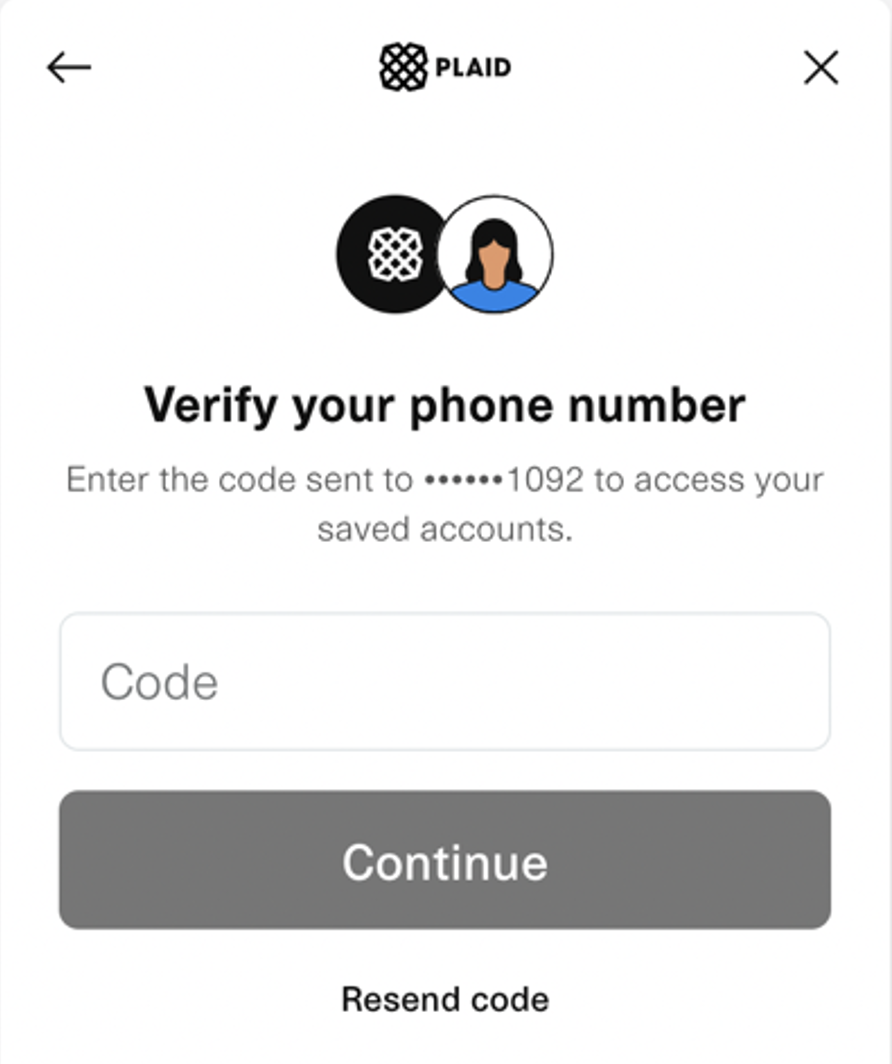
  11. Enter your phone number and click the “Continue” button. 

    Bill.com Plaid phone verification screen.
  12. A code will be sent via text to your mobile phone. Enter your code to proceed. 

    Bill.com Plaid code verification screen.
  13. On the following screen, you will search your bank institution by typing in your bank’s name. 

    Bill.com Plaid bank selection screen.
  14. Once you find your bank institution, you will be transported to your bank institution’s online log-in screen where you will enter your Log In credentials, as you normally do when logging into your online banking account.
  15. Once logged into your online bank account, you will be asked to select which account you want your funds to be deposited to. You may choose any of your active accounts. As soon as you have, click “Authorize Access” button and you will be brought back to the bill.com page and you will see a pop-window (see below) 

    Bill.com Plaid account selection screen.
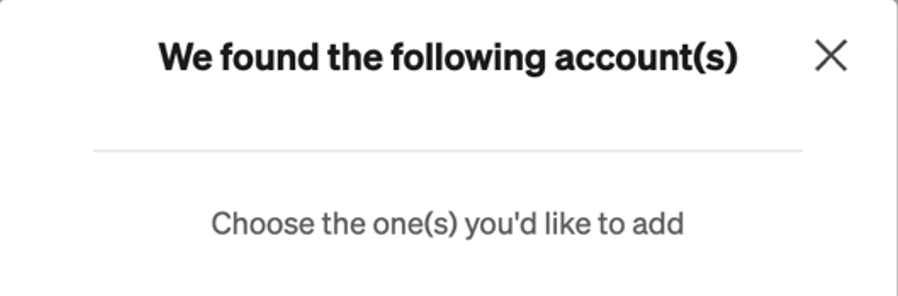
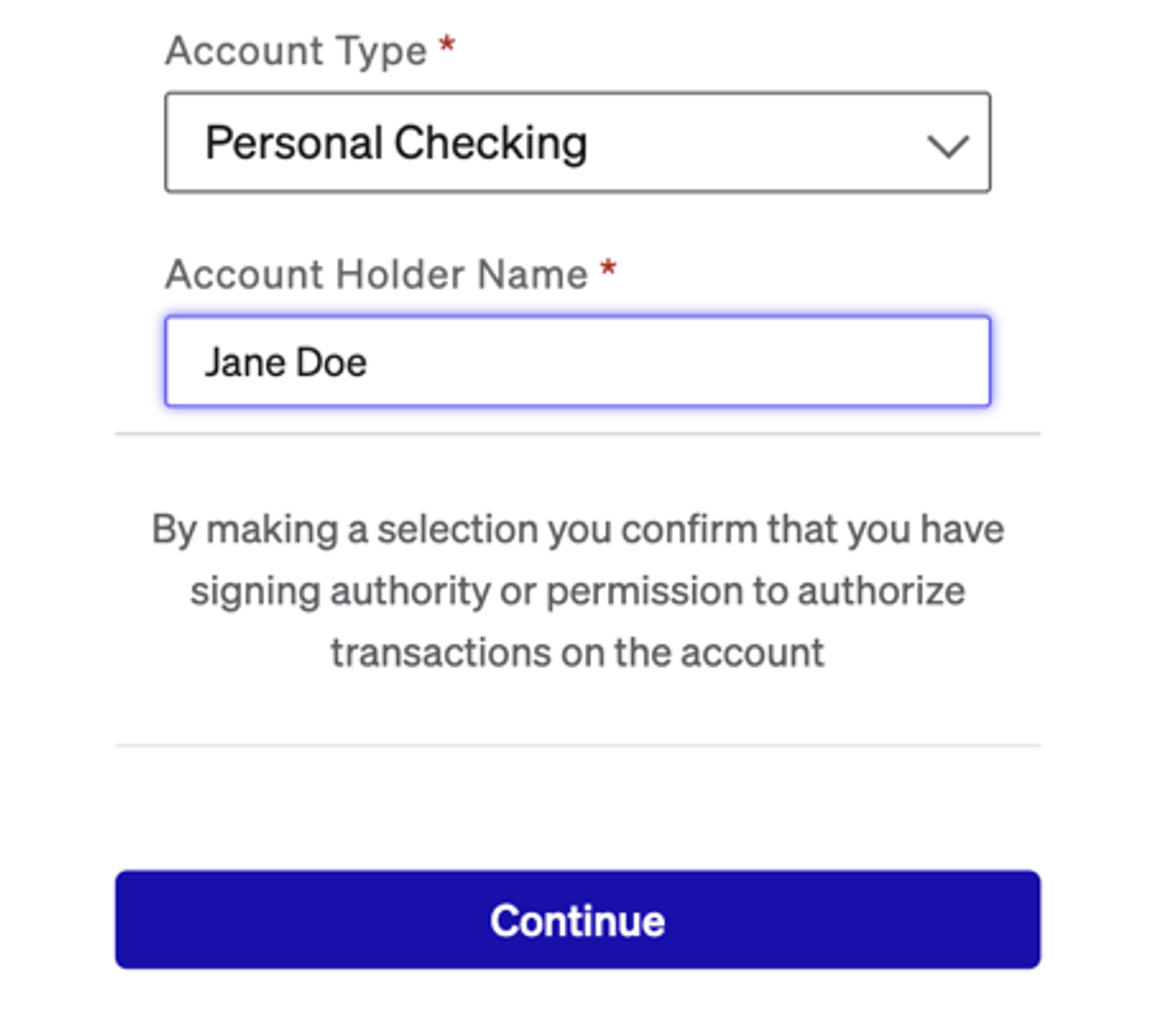
  16. You should see the account you selected from your online banking screen already listed. Check the box next to that account. Just below that you will see a drop-down menu asking you to select your “Account type” and the Account Holder Name (Hint: Your name should match exactly as it appears on your Bank Statement). Please pick whichever choice(s) apply to you and then click “Continue” button. 

    Bill.com Plaid select account type screen.
  17. On the next screen you will be asked to choose your preferred payment speed. Select an option, and you're all set!

  18. Bill.com will send a test deposit of .01 to your account, which you will have to confirm in Bill.


IMPORTANT

Please accept the Bill.com invite within 48 hours of receiving it to set up e-deposit.

We use essential cookies to make our site work. With your consent, we may also use non-essential cookies to improve user experience and analyze website traffic. By clicking "Okay," you agree to our website's cookie use.